Anasoft Scheduler PE User's Guide
2.
System Requirements Contents 4. Editing
a Schedule
Using Major Functions
3. Getting Familiar with the User Interface of Scheduler
3.1
Major User Interface
3.2 Task Editor
3.3 System Tray Icon and System Tray Menu Commands
3.4 Switching User Interface (UI) Languages
3.1 Major User Interface
There are 3 UIs you may often work with Scheduler:
1) The main schedule list frame;
2) Task Editor;
3) System tray icon and system tray popup menu.
The
main schedule list frame is the most important management UI for all your
schedules. You can perform all your administrative operations by commands in the
main menu, tool bar or popup menu in the schedule list.
After
you have finished your schedule administrative operations, you can close the
main UI the same way as you close other programs. Scheduler was not closed in
fact. It's just change a way to work in background. You can call the main UI
back by double-clicking the Scheduler icon  in the system tray at right bottom corner of the desktop.
If
you hope to prevent other from reading or editing your schedules or scheduling
settings, you can set an administrative password in the "Options"
dialog box. You can start "Options" dialog box by corresponding
command under "Tools" menu.
Usually
it's just OK to let Scheduler run in the background and let it monitor and run
schedules for you. However, if you really hope to exit from this program
completely for some reason, you can do it by the command "Exist
Completely" under "File" menu.
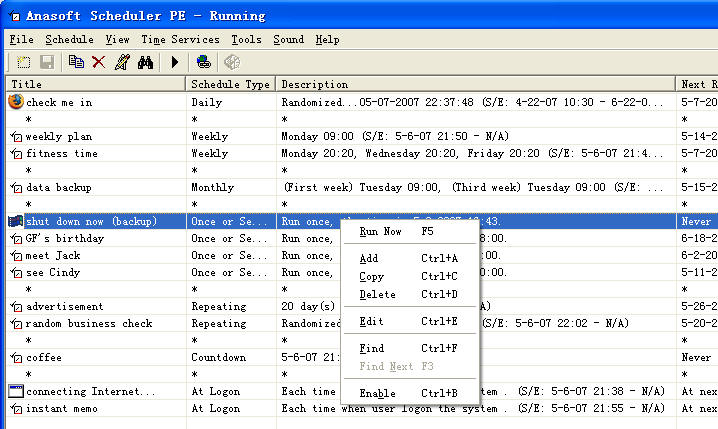
Pic
UG-3-1 Main Schedule List Frame - The place for all your schedule administrative
operations. If you don't hope other people to access this UI, you can set a
password in the Options dialog to protect your privacy.
3.2 Task Editor
You can add a new schedule (task) by the Add Task Wizard, and you can double
click any schedule in the schedule list to edit it by the Task Editor. Except
for the extra Welcome page and the Summary page in the Add Task Wizard, the Add
Task Wizard and the Task Editor are almost the same thing. This is the
place where you can set every detail for a specific schedule.
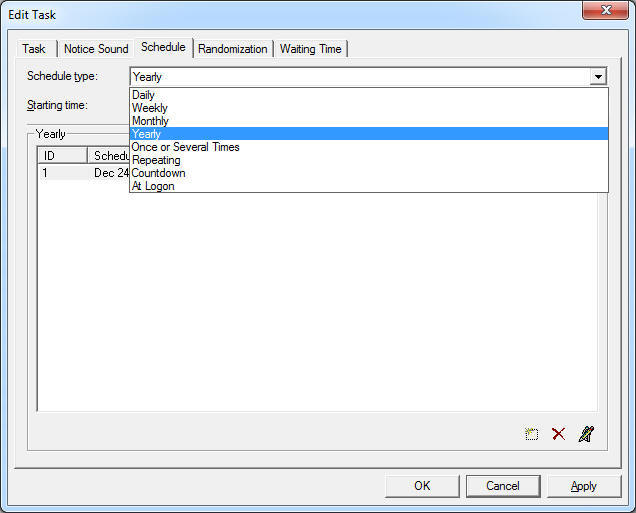
Pic
UG-3-2 Task Editor - The place to edit a specific schedule
3.3 System Tray Icon and System Tray Menu Commands
After you have finished adding or editing your schedules, there is no need to
let the main UI of Scheduler staying on your desktop, you can just close it to
let Scheduler running in background.
Now
the only way you can access the main UI is from the Scheduler icon in the system
tray at right bottom corner your desktop. You can double click it to access the
main UI (if the main UI is already opening, double-click the icon will close the
main UI). When you right click this icon, you can find a popup menu with several
commands you can use conveniently - Show/Hide Scheduler, Start/Stop Scheduling
and Stop Current Sound. If you have closed the main UI and set an administrative
password, you will be prompt for the password before you can perform either or
the first two commands.
3.4 Switching User Interface (UI) Languages
Scheduler supports multiple UI languages. You can switch UI language by
corresponding commands under "Tools" menu.
|